Remember, the condensed milk will thicken more as it cools.
It should coat the back of a spoon with a thick, syrupy layer.
Taste it and adjust sweetness if necessary by stirring in a little more sugar while still warm.
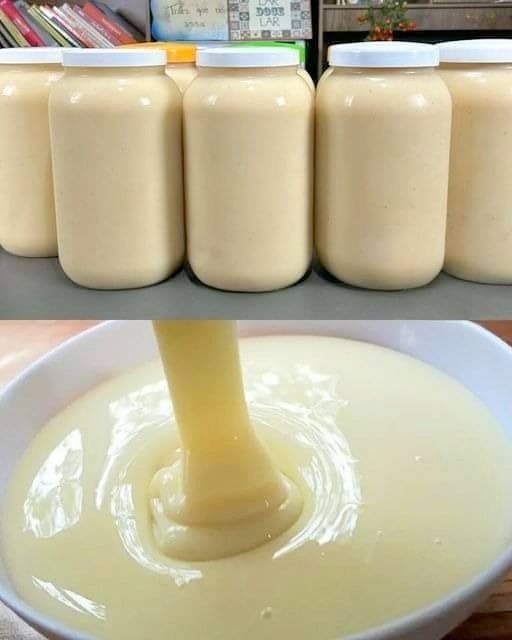
Step 6: Cool and Store
Allow the homemade condensed milk to cool to room temperature.
Transfer to a clean glass jar or airtight container.
Store in the refrigerator for up to 2 weeks.
Tips and Tricks for Perfect Homemade Condensed Milk
Use a heavy-bottomed pan: This prevents scorching and uneven cooking.
Stir frequently: To avoid burning and sticking, stir often especially as it thickens.
Don’t rush: Low and slow is the key to smooth, creamy condensed milk.
Avoid boiling: Vigorous boiling can curdle milk proteins.
Adjust sweetness to taste: Start with 2/3 cup sugar, and add more if desired.
Use full-fat milk: For the creamiest result.
Try organic milk: For a richer, cleaner flavor.
Variations to Try
1. Coconut Condensed Milk
Replace regular milk with coconut milk (full-fat canned version) and sugar to make a dairy-free, vegan-friendly condensed milk alternative.
2. Brown Sugar Condensed Milk
Swap white sugar for brown sugar to add caramel notes and deeper flavor. Great for fudge and caramel sauces.
3. Flavored Condensed Milk
Add 1 teaspoon vanilla extract or a pinch of cinnamon for extra flavor.
How to Use Homemade Condensed Milk
Homemade condensed milk is a powerhouse ingredient. Here are some delicious ways to use it:
In Baking
Use in pies (like key lime or chocolate pie)
Make fudge or caramel sauces
Sweeten cakes, cookies, and brownies
Beverages
Add to coffee or tea for rich sweetness (Vietnamese iced coffee is famous for this!)
Use in homemade hot chocolate or milkshakes
Desserts
Drizzle over fresh fruit or ice cream
Use in custards and puddings
Make creamy no-churn ice cream
How Homemade Condensed Milk Compares to Store-Bought
Cost-effective: Homemade is often cheaper.
Fresher: No preservatives or additives.
Customizable: Control sugar level and fat content.
Flavor: Often richer and fresher tasting.
Storage and Shelf Life
Store your homemade condensed milk in a clean jar with a tight lid.
Keep refrigerated.
It lasts about 2 weeks—always smell and taste before using.
If it smells sour or off, discard.
FAQ: Common Questions About Homemade Condensed Milk
Q: Can I use skim or low-fat milk?
A: Yes, but the texture will be thinner and less creamy.
Q: Can I use alternative sweeteners?
A: Granulated sugar works best for texture. Honey or maple syrup can be used but may alter consistency.
Q: Can I freeze homemade condensed milk?
A: Yes, freeze in small portions. Thaw in fridge before use.
Q: Why did my milk curdle?
A: Possibly too high heat or boiling. Keep heat low and stir frequently.
The Science Behind Condensed Milk
Milk contains water, fat, proteins (casein and whey), lactose (milk sugar), and minerals.
When heated gently with sugar, water evaporates, concentrating sugars and proteins, resulting in a thick, sweet syrup.
Sugar helps stabilize the proteins and prevents curdling.
Low and slow heating ensures smooth texture.
Step-by-Step Visual Guide (Optional)
If you want, I can also provide a visual guide with photos or videos on each step for easier following!
Final Thoughts
Making your own condensed milk at home is surprisingly easy and rewarding.
You save money, avoid additives, and get an incredibly versatile ingredient ready to enhance your desserts and drinks.
