Instructions:
Preheat your oven to 400°F (200°C).
Peel off the outer skin from the garlic bulb, leaving the cloves intact.
Slice off the top 1/4 inch to expose the tops of the cloves.
Place the garlic head on foil. Drizzle with olive oil and sprinkle with salt.
Wrap tightly and roast for 40–45 minutes, until golden and soft.
Let it cool, then squeeze the cloves out like toothpaste.
Pro Tip: You can make this a day ahead. Store roasted garlic in the fridge.
Step 2: Mix the Dough
In a large bowl, combine:
3 cups flour
1 1/2 tsp salt
1/2 tsp yeast
2 tbsp chopped rosemary
Roasted garlic (smashed or chopped)
Stir these dry ingredients to distribute evenly.
Then add:
1 1/2 cups warm water
Mix with a wooden spoon or silicone spatula until it becomes a shaggy, sticky dough.
Important: Don’t overthink it. This dough will look messy. That’s okay.
Step 3: Let It Rest (Ferment)
Cover the bowl with plastic wrap or a damp towel. Leave it at room temperature (ideally 68–75°F) for 12 to 18 hours.
As it rests:
Gluten develops naturally (no kneading needed).
The yeast feeds on the sugars, forming air pockets.
The rosemary and garlic infuse the dough.
When it’s ready, the dough will be:
Puffy
Bubbly on top
Slightly jiggly when the bowl is moved
Step 4: Shape the Dough
Flour a work surface heavily.
Gently pour the dough onto the surface—don’t punch it down.
With floured hands, shape it into a rough ball by folding edges over itself like a package.
Let it rest seam side down for 15–30 minutes.
While it rests:
Place a Dutch oven (with lid) in your oven and preheat to 450°F (232°C) for at least 30 minutes.
Step 5: Bake the Bread
Transfer Dough to the Dutch Oven:
Place the shaped dough on parchment paper and carefully lower it into the hot Dutch oven.
Slash the top with a sharp knife or razor for a controlled rise (optional).
Cover with lid and bake for 30 minutes.
Remove the lid and bake another 10–15 minutes to develop a golden crust.
No Dutch Oven? Use a cast iron skillet or baking sheet and place a pan of water in the bottom of the oven to create steam.
Step 6: Cool & Slice
Remove the bread from the oven and let it cool on a rack for at least 1 hour.
This step is hard, but crucial. It allows the structure to set and the steam to finish escaping.
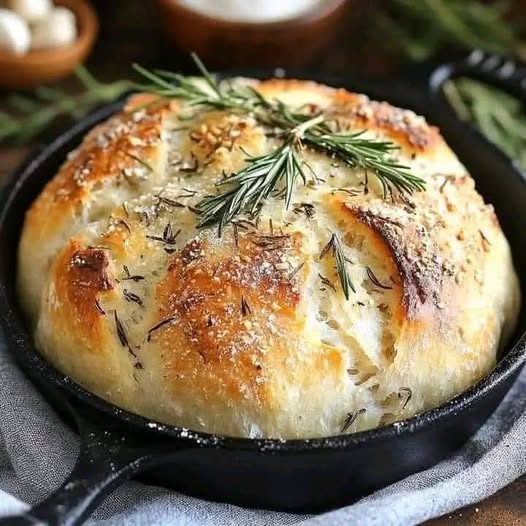
When you finally slice it, you’ll see:
Crispy, golden crust
Airy, moist crumb
Flecks of rosemary and tender bits of garlic throughout
🌿 Tasting Notes
Your kitchen will smell of garlic, herbs, and warm bread. The crust will crack slightly when pressed, and the inside will be so tender, you won’t believe it required no kneading.
Pair it with:
Olive oil and balsamic vinegar
Creamy brie or goat cheese
A bowl of hearty tomato soup or lentil stew
Poached eggs and sautéed greens for breakfast
🧠 Tips, Variations, and FAQs
🔁 Variations:
Olive & Rosemary Bread: Add 1/2 cup chopped kalamata olives to the dough.
Cheesy Garlic Bread: Fold in 1/2 cup shredded parmesan or mozzarella.
Spicy Kick: Add crushed red pepper flakes or roasted jalapeños.
Lemon Zest: Add 1 tsp zest for a bright, Mediterranean note.
🧠 Pro Baking Tips:
Hydration matters: This is a wet dough. If it feels too dry, add 1–2 tbsp more water.
Flour type: Bread flour gives more chew; all-purpose is softer. Both work!
Fermentation time: Don’t skip the long rise—it’s the key to the flavor and texture.
Don’t skip the steam: The covered baking creates steam for that crunchy crust.
❓FAQs
Can I use active dry yeast instead of instant?
Yes. Use the same amount, but dissolve it in the warm water first before adding to the dry mix.
Can I shorten the rise time?
Not recommended. However, you can place it in a slightly warm (but off) oven to speed things slightly. Still allow 8–10 hours minimum for full development.
How do I store the bread?
Wrap in a towel or store in a bread box. Avoid plastic—it ruins the crust. Eat within 3 days or slice and freeze.
Can I double the recipe?
Yes, but you’ll need a larger Dutch oven or bake two loaves separately.
🌍 A Bread with Global Roots
This rustic bread style borrows from European peasant loaves—slow-fermented, naturally flavorful, and often cooked in communal ovens. The rosemary connects to Mediterranean traditions, while roasted garlic adds a universal comfort note. It’s global comfort food made simple.
🧡 Final Thoughts
Rustic No-Knead Rosemary Garlic Bread is more than a recipe—it’s a baking philosophy. It teaches patience, rewards simplicity, and delivers exceptional flavor without effort. Whether you’re a first-time baker or a seasoned home chef, this bread is the kind of thing you’ll make again and again.
It’s the perfect centerpiece for dinner, a soulful weekend baking project, and a reminder that sometimes, less is more.
